
The steps for inserting an image onto a slide are simple. The steps are so simple that on the first day that my students were inserting pictures, they picked up on the pattern quickly and acquired a new digital skill. Modeling and breaking down the task into kid friendly steps is important. Below is a run through of how I taught this task of inserting images with my students, starting from when they were in Google Slides.
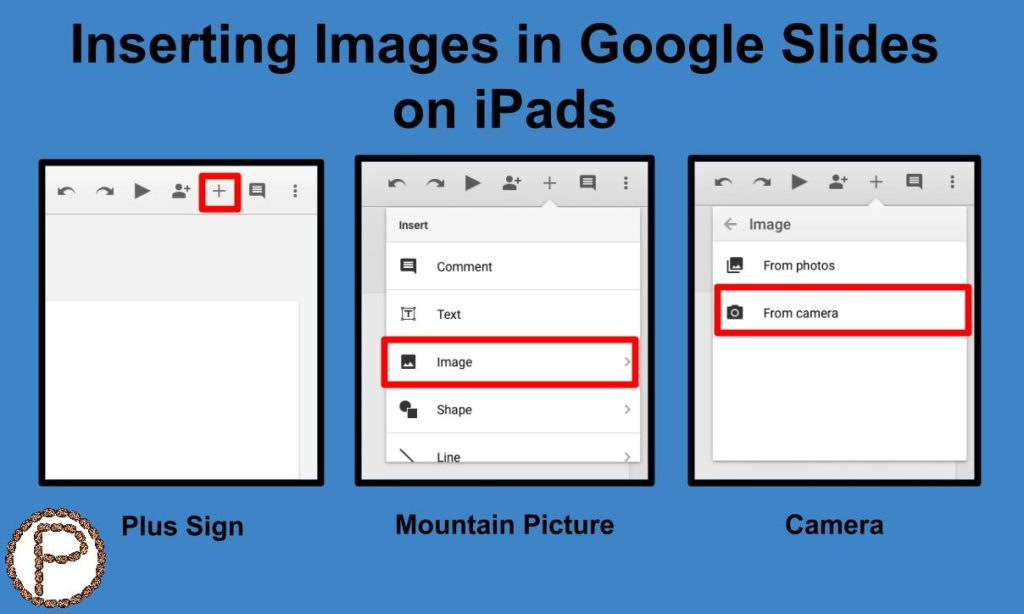
- Tap on the plus sign, tap on the mountain picture, tap on the camera
- Hold the iPad so the handle is on the bottom (landscape picture fits nicely on Slides)
- If you are standing close to something when you take a picture, you won’t be able to see the whole picture (model that error). If you step back or move your arms in, you can get more in your picture (model this as well).
- You’re going to push the white button to take a picture, now go take a picture and come back to me
- Tap on Use Photo (if the student didn’t like it, point out the Retake option)
- With one finger, hold and drag the corner to shrink the picture (make sure the image has the blue outline)
- Tap on the next slide
- Time to start over! Do you remember how to get to the camera? What do you tap on first? (They can answer these questions after they have inserted a picture two or three times).
My kids picked up on those steps quickly. The next time they did an inserting picture task, I went to model how to get the camera and they were telling me they knew or remembered.
Things Littles May Encounter
- not moving to the next slide before taking the picture – This means students would have two images on one slide. Point out the back arrow to undo or have students hold down the image for an option to delete the image, or you can show them how to cut and paste it to where it is supposed to go.
- moving the image too far off of the slide – Encourage the kids to stay in the white area. It’s not too much of a big deal if some of the image is off the slide, but bringing awareness to it is okay. Show them in presentation mode what happens to the image if it is off the slide.
- the urge to use two fingers to shrink the image – Remind the kids to use one finger and to lightly hold a corner to shrink the image. Adjusting the size of the image without moving the image in the process takes some practice.