
One of the benefits of using Google Apps on the iPads is that once the kids are logged in, they do not need to sign out! To access a different user, it’s just a matter of switching accounts. If you a whole class set of iPads that live in your room, this is rocking! However if you have a small set or share devices with another class, the kids have easy access to their peers’ accounts. It’s a matter of embedding that habit of switching accounts every time they are done in their accounts. Below is a visual demonstrating how simple it is for students to switch their own accounts.
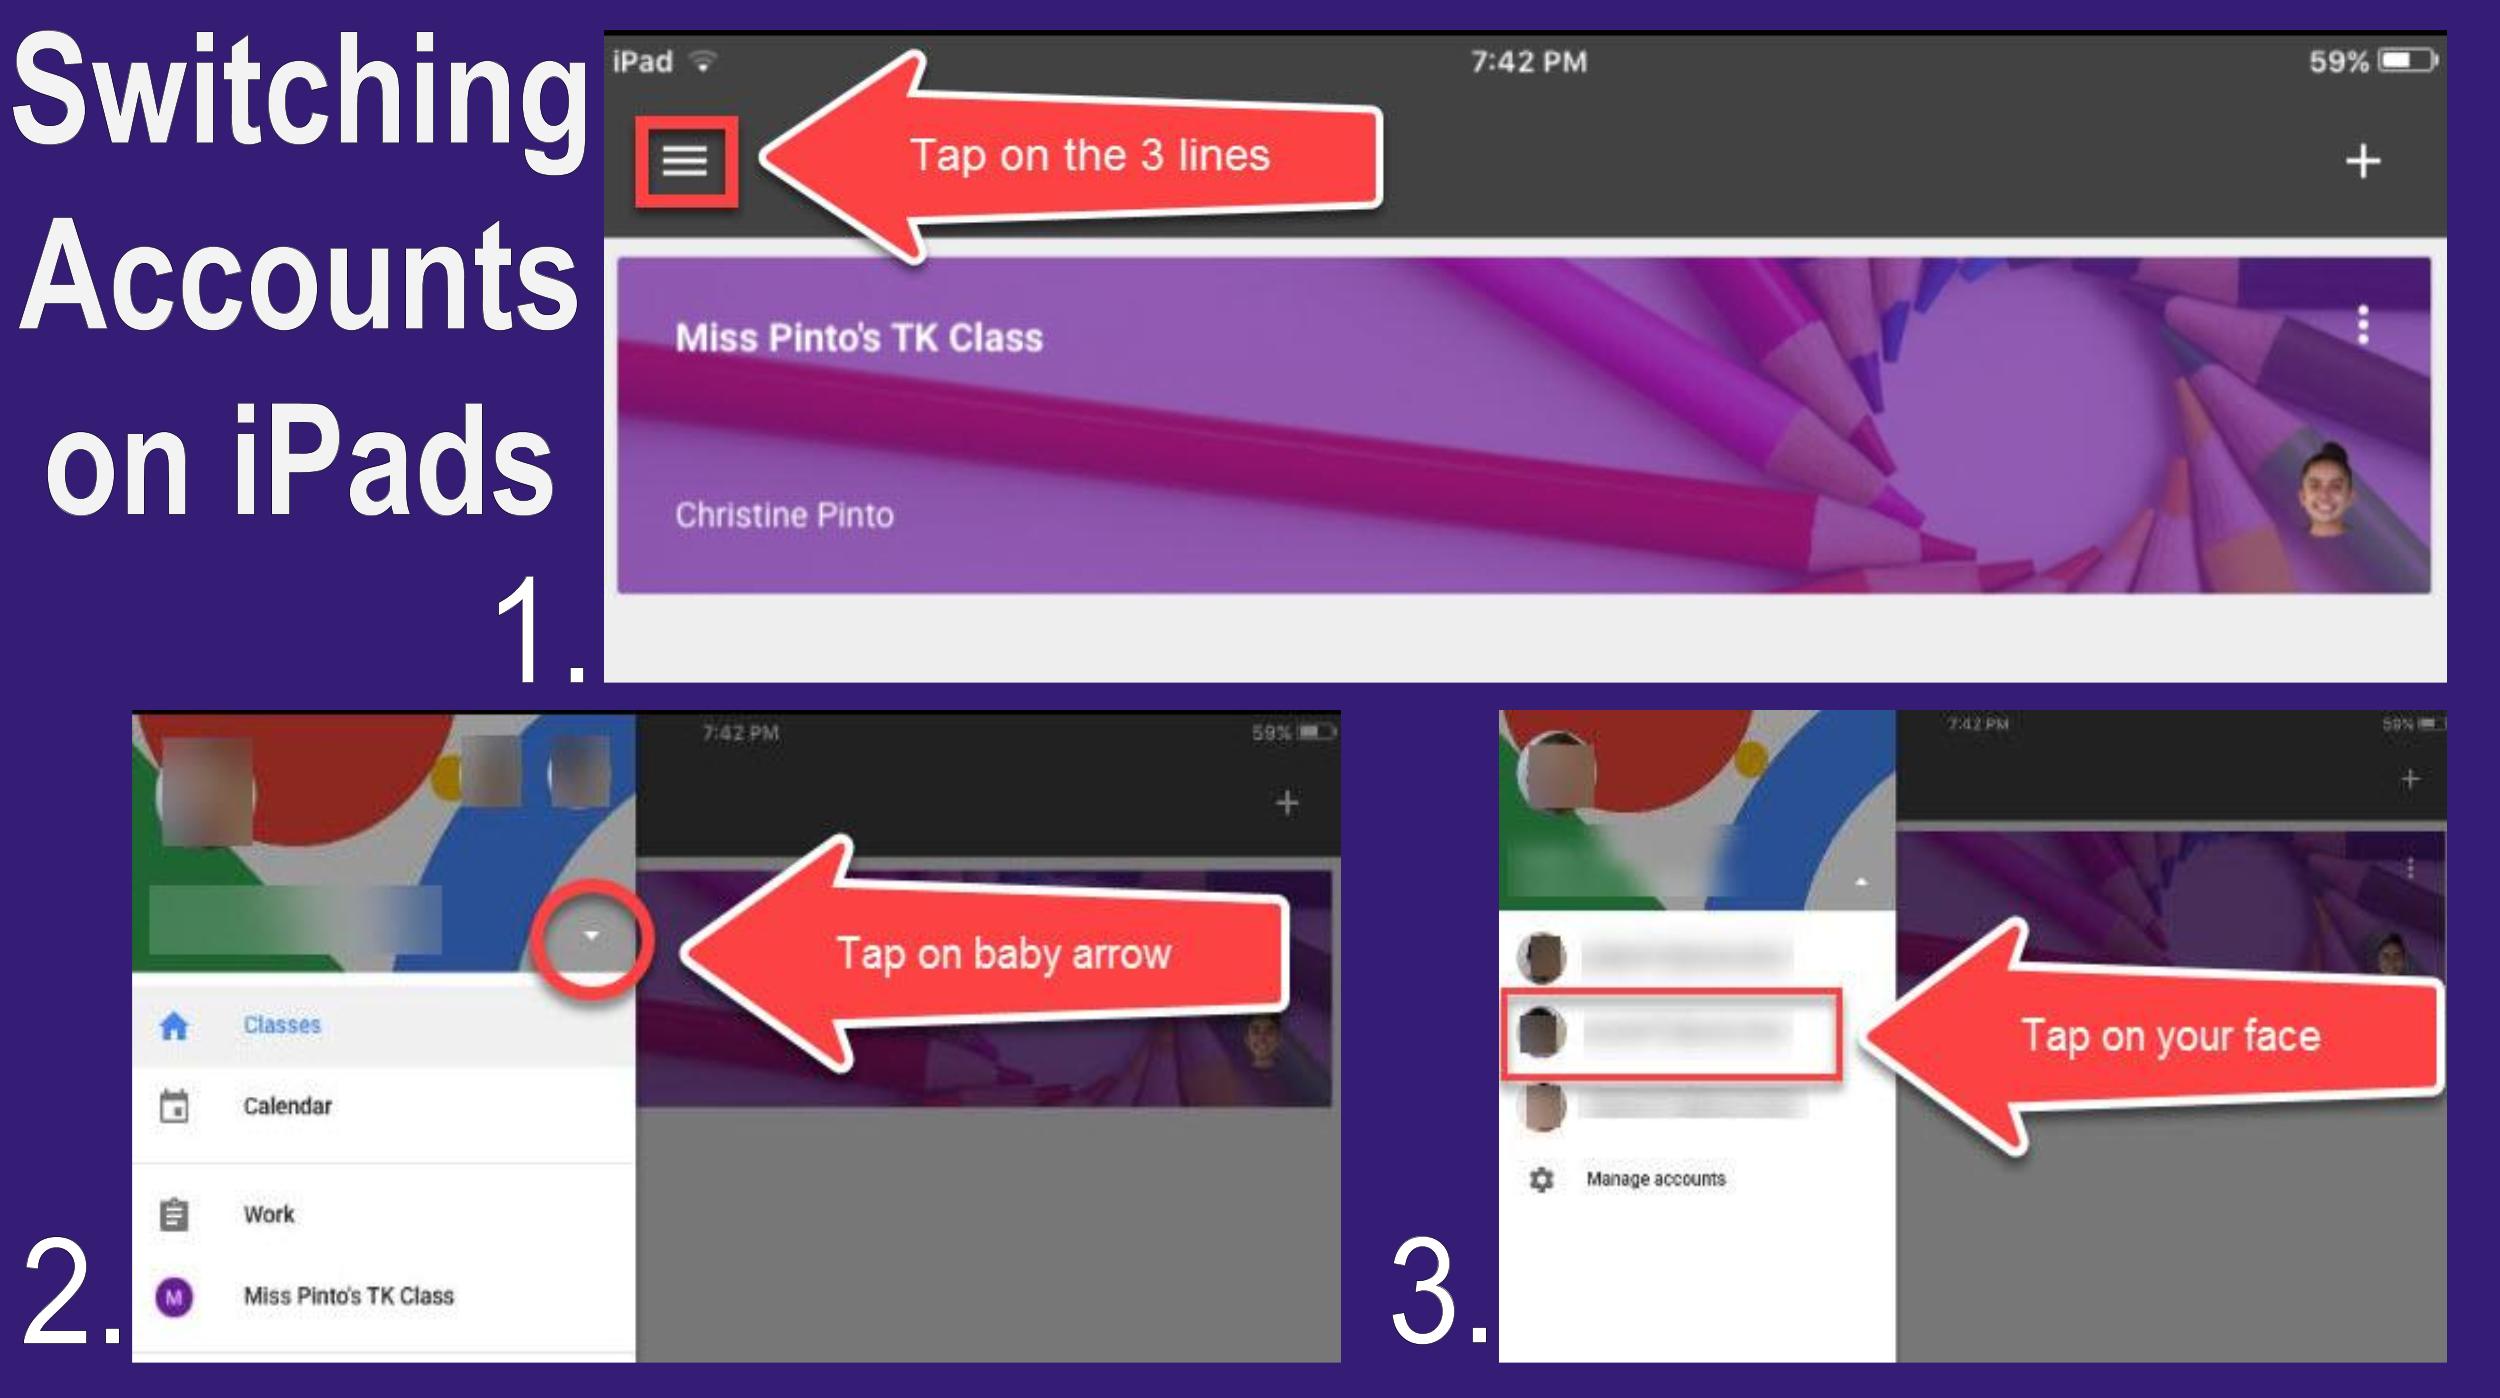
Since I worked with students in a small group with iPads, I was able to make sure they were tapping on the correct user account. We had a talk about being careful not to choose the wrong picture, because if they did it was like working on someone else’s paper or putting your name on the wrong paper. It’s always important to have some type of a digital citizenship talk with your students, regardless of their age.
When I was working with TK (4 and 5 year olds), we had access to six iPads two days out of the week. We shared the iPads with two other classes who also used Google Apps. We were able to sign three classes onto the iPads (that was about 16 students to each iPad). TK accessed Google Apps on the iPads during 15 minute centers. In that time, my students were able to switch accounts, navigate through Google Classroom to access the assignment, and start working on the assignment. Some assignments took more than one day, and that was okay!
Before Setting up iPads
- Create a Google Classroom and write down your class code.
- Be sure to have a list of your students’ school Google email addresses and passwords
Getting iPads Ready for Students
Since I worked with the youngest of the Littles, I did all of the initial Google account set up for my youngsters on my own. Having them type out their usernames, click through prompts, and join Classroom were not tasks they would need to practice because the set up is only done once. Like any initial device set up, it is going to take some time to complete, BUT it only has to be done ONCE! My best advice is to read through the steps below and to check out the end of the blog which provides suggestions about tackling the set up process.
1. Install Google Apps on each iPad
Install Google Classroom, Slides, Sheets, Docs, Drive, and Google (the one that says made just for mobile) and group them on the iPad. Depending on your grade level, you may have your students using YouTube, Google Maps and Gmail. Once the apps are installed, you can tap and hold one of the apps and drag it on top of another to create a group. Drag the other apps into the group. Title the group and put it into the taskbar.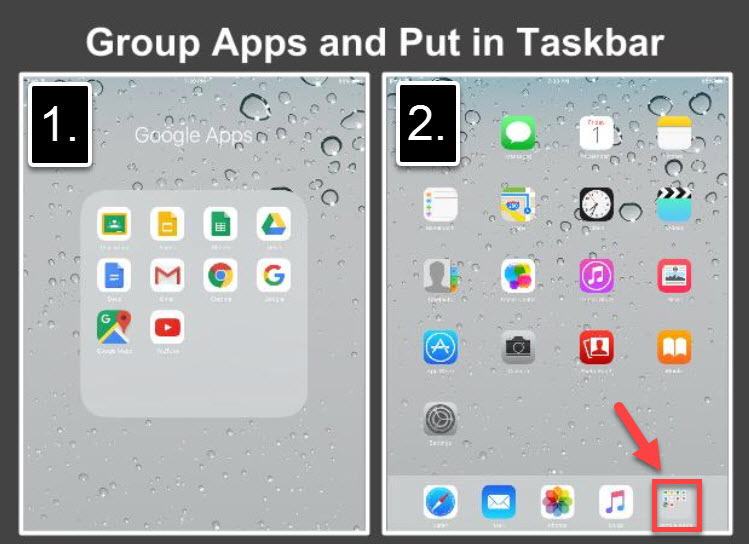
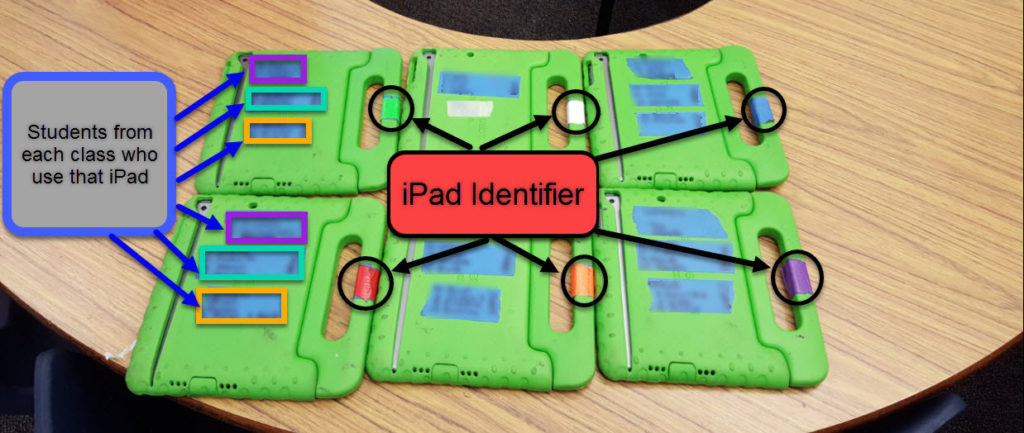
2. Put iPad Identifiers
iPad identifiers are special marks on each iPad so the kids know which device is theirs to use. There are fancy was to do this, I just put a piece of colored tape on the handle of the iPad case.
3. Assign Students to iPads.
- If you are 1:1 with iPads, number the iPads off and inform students of which number they are. If you have a small group of iPads, label which students are on each iPad. In the beginning, students may forget which iPad they are supposed to use, so having the label on the back is a helpful reference.
- If you are using iPads during center rotations, be sure each student in the rotation gets a different iPad. Do not assign one whole group to the same color iPad or they will be on the same device at the same time.
- If you are sharing devices as a grade level, there is enough room for those teachers to add labels for their students who also use the same iPads. In the image below my class is outlined in purple, another teacher’s is outlined in turquoise, and another teacher’s is outlined in orange.
4. Log students into Google Classroom
After initial student login to Google Classroom, I suggest that you tap through the tour the app provides, because it will be distracting for the kids the first time you want them to use the iPads.
5. Add student profile pictures
I find the task of applying profile easier to do on the computer, but if iPads are the only device you have access to it is still possible. This can be done in the Google app on the iPad.
Repeat the process for each student, and then the iPads are ready for the kids! In Google Classroom on a device of your preference, assign the assignment you want the kids to work on. Modeling is important for young learners, so walk through the steps of how to access and navigate through Google Classroom on the iPad. If you need step by step directions of how to do all of this, please view the guide below.
Insight and Suggestions for iPad Setup
- If you are signing students into their Google accounts for the first time: get a snack, put some music on, and invite a teacher friend and together you can get the iPads ready for Google Apps access. Good company always brings good vibes! 🙂
- Ask your technology administrator if he or she can push out Google Apps to all the iPads at the same time. This can save you a step! Also, find out which Google Apps your school domain has access too. Some apps may not be featured for your district/school, such as Gmail.
- Not all the steps have to be done in one sitting! Consider doing one or two steps at a time until set up is complete.