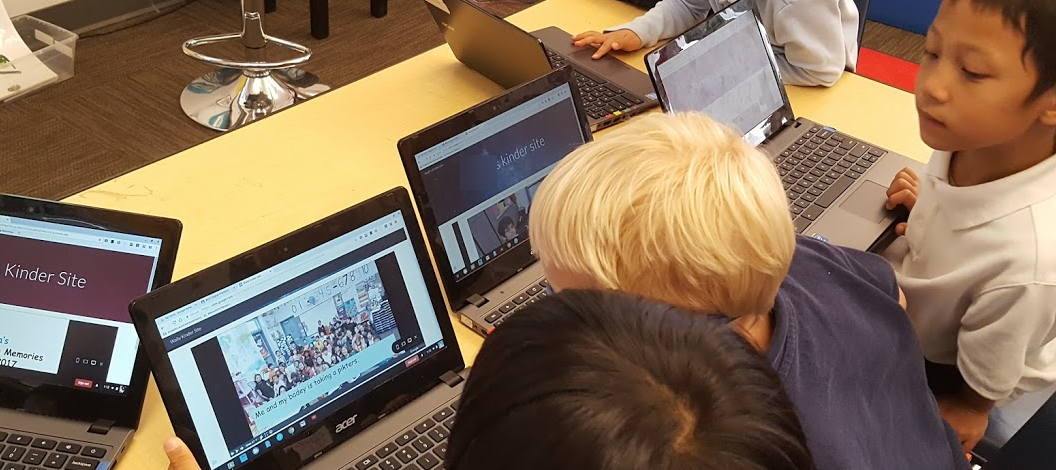
The new Google Sites (pretty version that came out the latter part of 2016) is super user friendly, so friendly that LITTLE KIDS can create their own websites! This year I had my kindergartners create digital portfolios in Google Sites. I wanted the kids to showcase their amazing digital work for open house and be able to share their links with anyone. I learned a lot from this experience with the kids and am sharing approaches I took along with some tips.
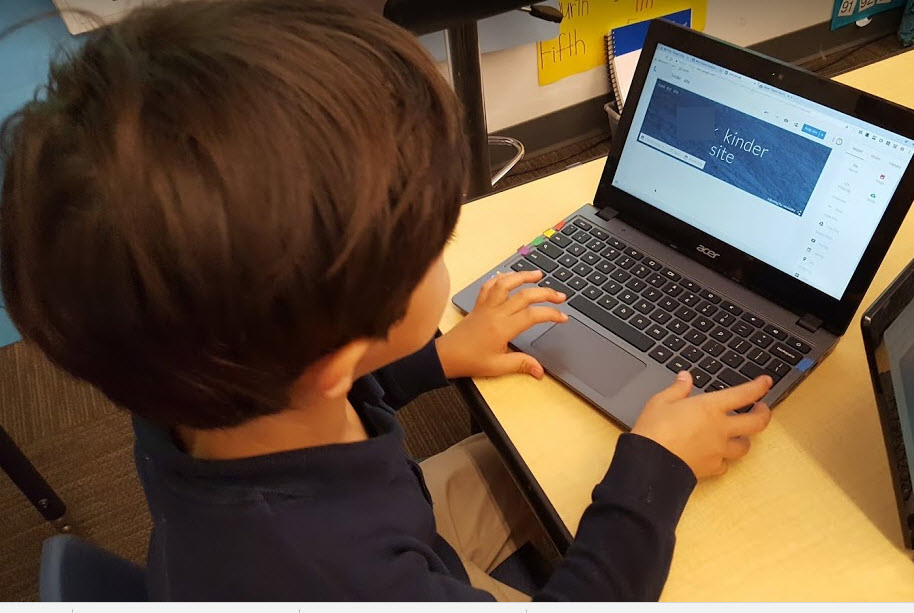
Phase One – Setup
Assigning in Classroom
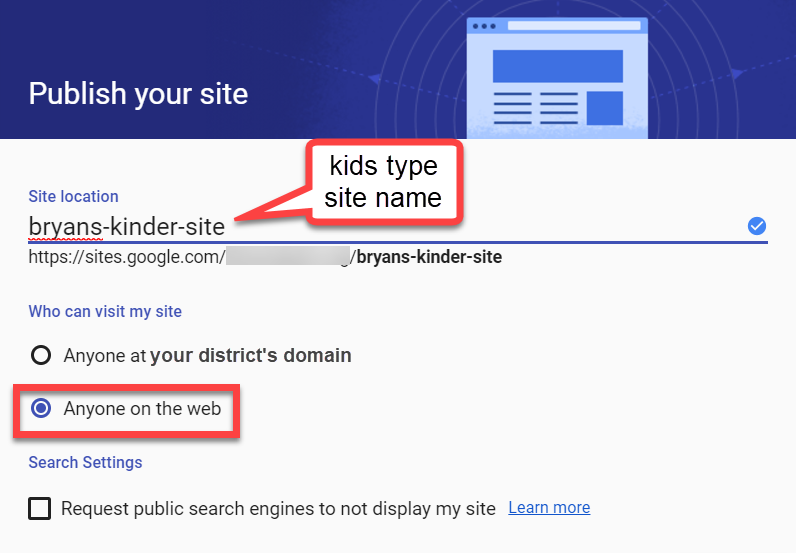
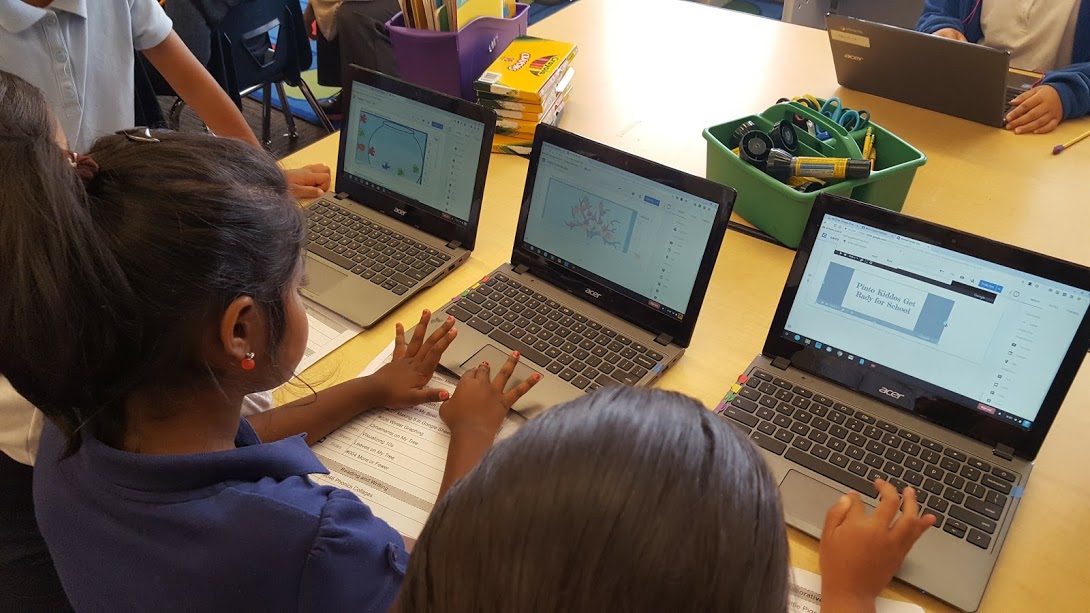
My kids start in Google Classroom with EVERYTHING, even if they are will be using a tool outside of Google Apps. Google Classroom is part of the workflow – the kids know to start there. The link I assigned the kids was sites.google.com/create because upon clicking on the link, it will open a new tab with an untitled site.
Publishing
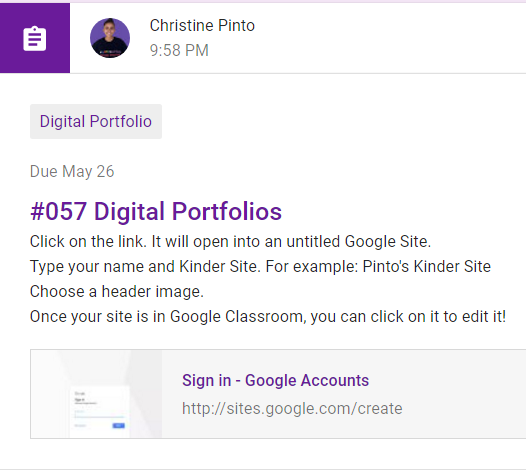
The kids worked on this part in a small a group. As they were working on other projects, I rotated them through and had them complete the first steps. I wrote on the board what they were to title their website: _________’s Kinder Website. Since they finished typing at different times, I was able to guide them in the publishing setup. When they click on the dark blue PUBLISH button, they type the name of their site which becomes part of the URL. It’s a trip for them because the apostrophe doesn’t work and spaces become dashes. I instructed them to click the “Anyone on the web” option for visiting options, because their sites were going to be shared with families who can pass them along to other family members or friends.
Copying the Website Link into Google Classroom
When the kids click on the link in the omnibox (URL box) it highlights it blue and it is all selected. I had the kids use the shortcuts to copy (CTRL C) and paste (CTRL V) into Google Classroom.

The kids go back to the Google Classroom tab with the opened assignment, click on ADD and select “link” and paste the link.
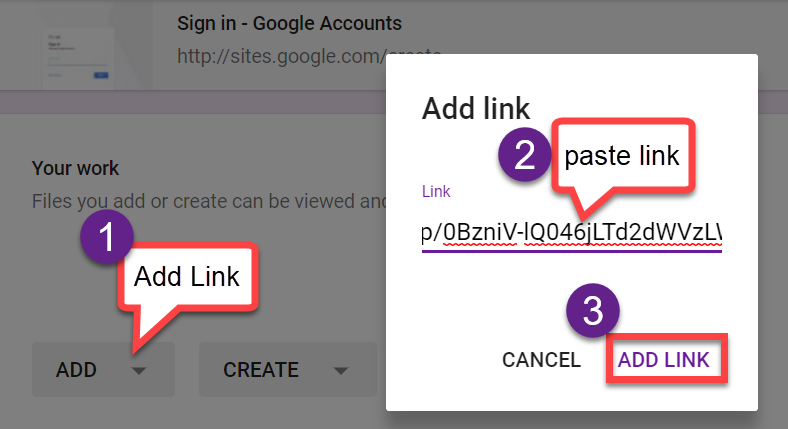
What I didn’t realize was that by the kids copying that link into Google Classroom, it would give me editing rights, which wasn’t a bad thing. For reference, if you want to add a collaborator to your Google Site, you need enter their email address and give them editing rights.
Choosing a Header Image
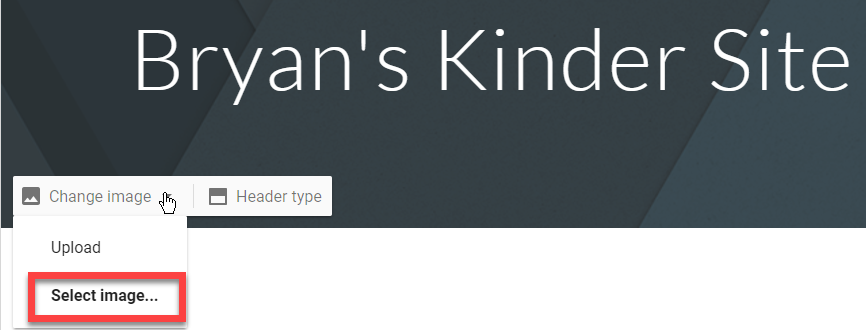
I think the kid’s favorite part of phase one was selecting their header image. When the kids hover to the left side of their site they will see the option “Change image” and they select “Select image…” and choose one of the headers. Alternatively, there are options for kids to select images from Google Drive, the Web, etc.
Phase Two & Beyond – Adding Pages & Content
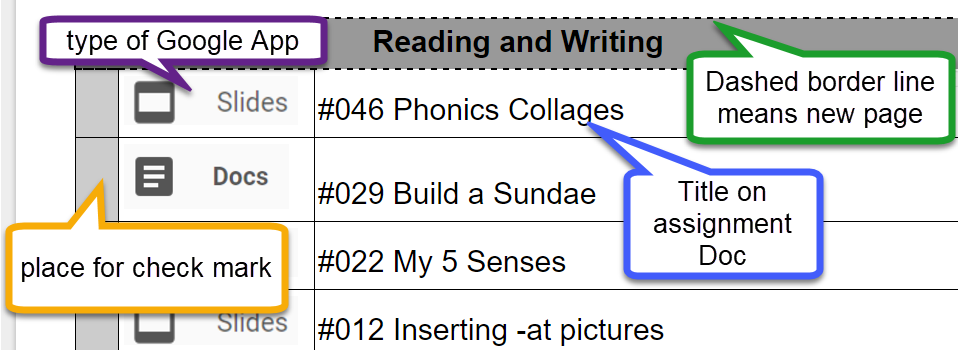
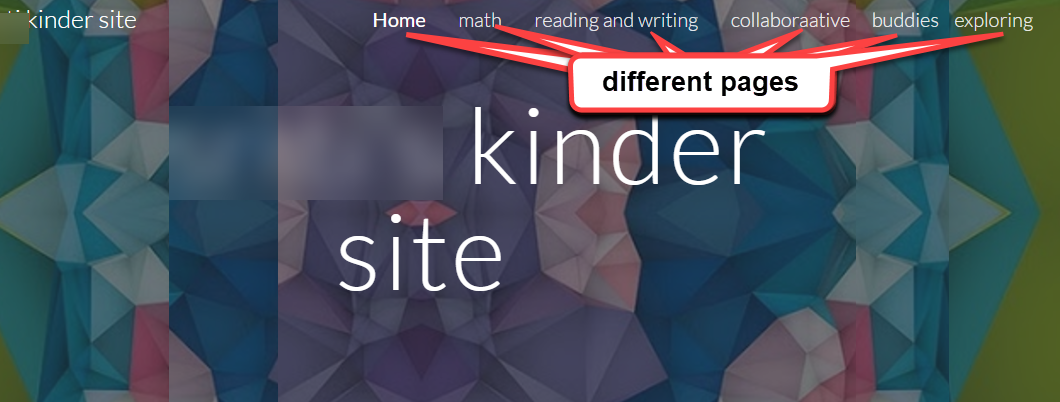
I have no regrets rotating the kids through to get that initial setup for their sites done. However, I wanted to avoid continuing the small groups because all of my kids have devices! The kids can move forward with this project at a more reasonable pace if they are all working at the same time. I looked through ALL of my Google Classroom assignments. I selected a few assignments for following categories: Math, Reading and Writing, Collaborative, Buddies, and Exploring. I created a checklist of assignments for the kids to include for each category, or webpage. Below is a part of a section on the checklist.
christinepinto.com/portfoliochecklist
I created the checklist in Google Docs and got some tables going. Each table included the title of the webpage (found in the dashed line gray area) and all of the items that would be included on that page. I typed out the assignment titles exactly how the Doc was labeled (having the hashtag as part of the assignment really came in handy). I also included the type of Google App the assignment was completed in, since that would help the kids find their assignments with more ease. The shaded gray box area was for the kids to physically check off once they inserted the assignments.
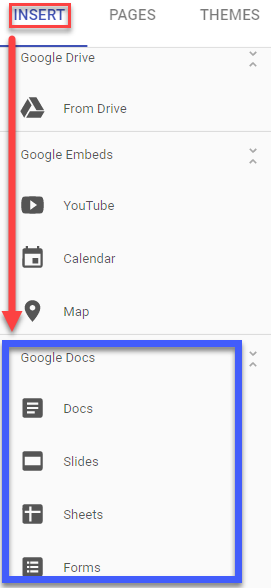
There are a couple different ways to insert an item in Google Sites. The way I figured was easiest for the kids was to insert via Google Docs verses the Drive option. For example, if the kids were looking for the My 5 Senses activity, they would see the Google Slides icon on their checklist, match it to the Insert menu ans select it. Then, all of the Google Slides activities they created would appear, and the kids could search for the hashtag to insert the item onto the site. To insert items like Google Drawings or videos, they would have to click on From Drive instead.
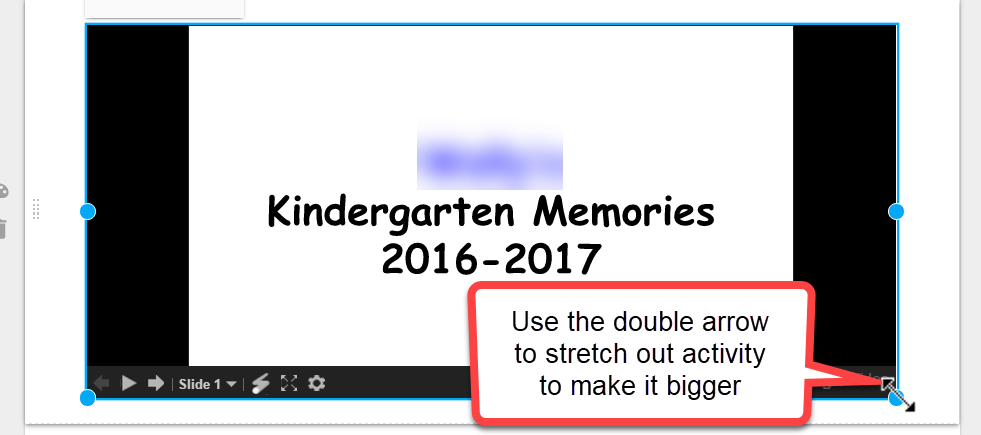
From there the kids stretch out the item to make it larger and easier for the viewer to see. I told them to click on the activity and use the double arrow to stretch out the activity to make it bigger.
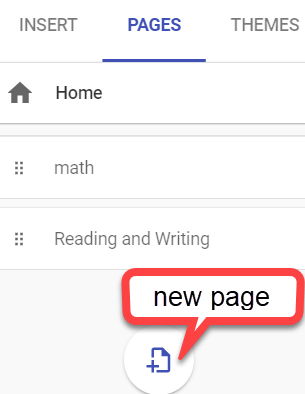
The kids picked up on that pattern of matching the icon of the Doc from the checklist to the insert menu on Sites, looking for the hashtag or assignment title, selecting the activity and inserting it, and stretching it out to be larger. When it came time for the kids to insert a new page, the would select Pages and click on the page plus icon and title their page. That’s really all there was to the portfolio creating on Google Sites.
Insight and Tips
SUPER IMPORTANT – Viewing Access
Google Sites will look beautiful for the kids when they are inserting their assignments, because they have access to those assignments. By default, when using Google Classroom, those files can only be viewed by the teacher and the students. An easy way around this is for the teacher to change the viewing access on the Google Classroom folder. In Google Drive, you will find a folder titled Classroom. Click on the Classroom folder and click ONE TIME on your class folder so that it highlights blue. Click on the share icon man and change the settings to “Anyone with the link can view.” This means that anyone with the links to any of the assignments can VIEW them.

Management Advice
My advice would be to set aside time for the kids to be working on one page a day on their sites. For example: Monday is the Math page, Tuesday is the Reading and Writing page, Wednesday is the Collaborative page, and so on. Don’t get me wrong, the kids are completely capable of moving ahead. I had two girls create their entire site portfolios in ONE DAY! I suggest to have the class focus on one page at a time because I had some kiddos who were on a roll and forgot to create new pages for new categories. This isn’t horrible, but it took some time for them to fix it. When doing a new page a day, the kids will pick up on FIRST CLICK ON PAGES and click on the page plus icon to title a new page, THEN INSERT THE ACTIVITIES.
Explaining What a Website is to Littles
This is the talk I had with the kiddos before they started creating their sites:
You are going to be putting all of your Chromebook work into a website! It lives in Google Drive and only you can see it, so when it goes on a website you get a link and ANYONE who has the link can see it! This means your parents can see it, and they can share it with more family and friends. If you have parents in China, they can see it from where they are too!
Editing the Website verses Viewing the Website – the kids wondered why they have to click the Publish button. I told them their work automatically saves, but when they make changes to their website it is good to click the Publish button every once in awhile. This is the best picture I could paint for them:
Do you know how you play on the abcya.com website? You play the games they published onto their site. If they create a new game and add it to the site, you can’t see it until they click on their publish button.
Sharing the Links with Parents
All of the kiddos got to have their websites displayed during open house. For many kiddos this was the first thing they wanted to show their parents. 🙂

Of course, I wanted the parents to have access to the websites after open house. I created a Google Doc with a list of the kiddos names. Their names were hyperlinked to their websites. I emailed the list to the parents. When they clicked on their child’s name, the website would load.
A Few Screenshots of Sites
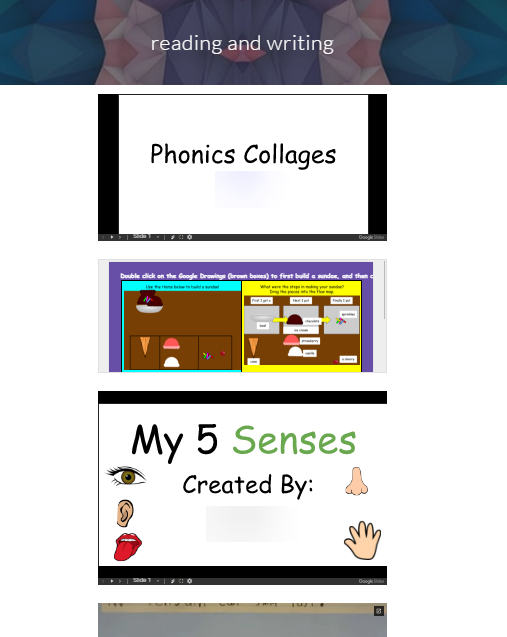
Here is a sample of the reading and writing page that is zoomed out.
