
Students of all ages need opportunities to work collaboratively with their peers. Through collaboration kids learn how to think, share, and work together. Collaboration comes naturally to some children, especially during play. Collaboration through the use of technology is also possible for little kids. It starts off basic with the kids working in their own individual slides within the same presentation, but can evolve to the kids working in the same slide in their own text boxes to share what they are learning
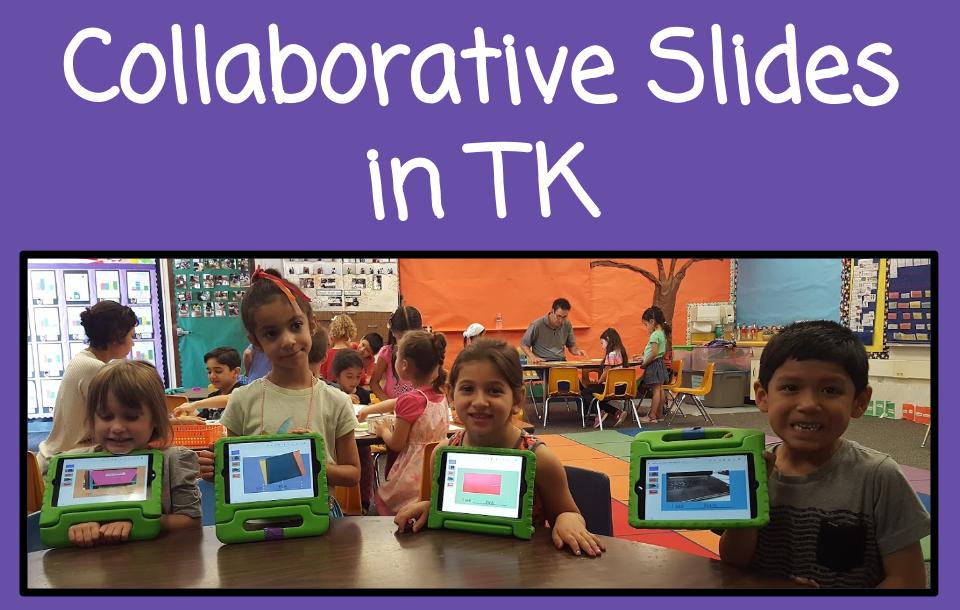
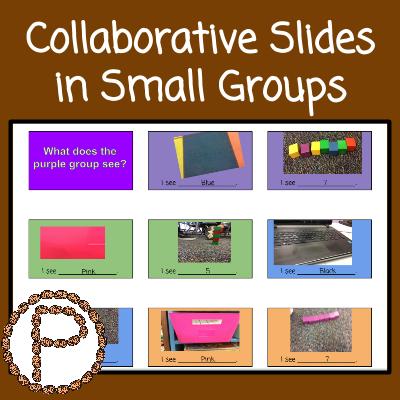
I decided to see how collaborative slides would turn out with my transitional kindergartners. This would require the kids to be working within the SAME Google Slides presentation at the same time. I shared with them that when they came to my center, they were going to make a book (Slides style) about the colors and numbers they saw in the classroom. They did great! Check out the purple group’s presentation below.
The kids did EVERYTHING. They inserted the layout slide, took and inserted the picture, adjusted it’s size, and typed the color or number!
How did they do that without messing up?
I was literally asked that question on multiple occasions when I shared my TKs worked within the same Google Slides presentation. Here’s some background of how it all worked:
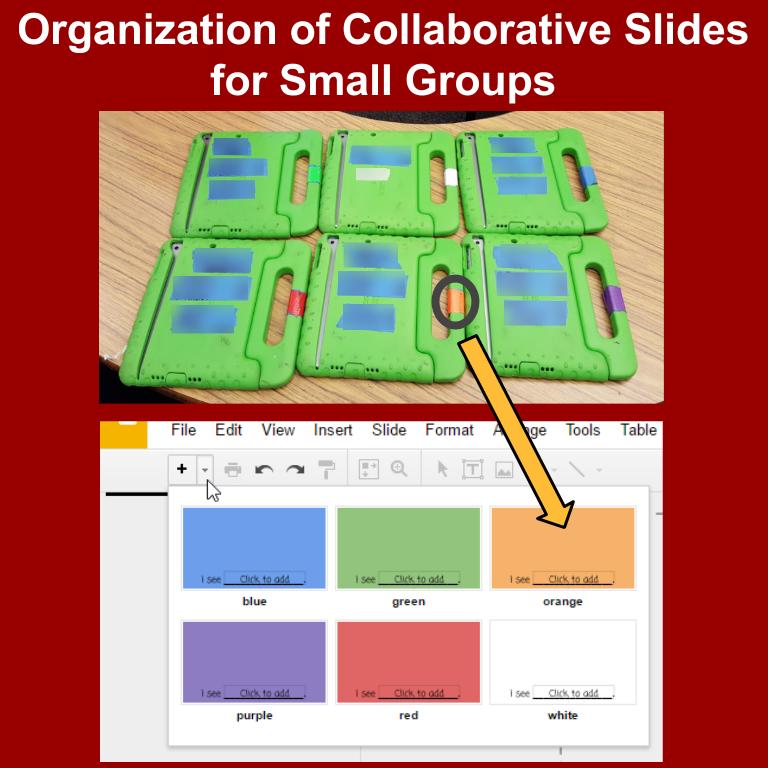
My students rotated in groups during center time. Their rotation group was identified as a color, hence the title “What does the purple group see?” Additionally, the iPads the kids work off of had device indicators, which was a piece of colored tape. Students inserted a layout slide based off of their device indicator color.
I talked to the kids about how they were going to be working in the same book, or Google Slides presentation. I tried to use terms like “insert” or “layout” or “slide” when speaking with the kids, but always tied it to language they would understand.
After I shared with the whole class about the task they would be doing in Google Slides that day, I went into more detail about how things work when working in the same presentation.
You are going to work together in the same book. That means you will be able to see your friends’ work. It can get tricky because you might accidentally work on another friend’s work, like if you put your name on Billy’s paper or start writing on his paper. I brought a kid up to the front of the class with me and acted out that exact scenario with paper. Then I did a quick demo of how they were going to complete the task on the iPads.
Once we were in our small groups during center time, I modeled more thoroughly on how to insert the layout slide. On the iPad, the icons for inserting a layout are a little different.
If I have the purple iPad, I am going to tap on the tiny slide, or rectangle, with the plus sign to insert, or add, a purple slide. It looks like a purple rectangle. So the purple slides (rectangles) are mine. If I see a green slide (rectangle) I am working on someone else’s work.
As I mentioned before, the kids did an amazing job with this task. They were not only working within the same document, but were also demonstrating their understanding of concepts they have learned about. Have a new goal for the kids each time they work collaboratively. Build on what they already know in terms of learning objectives and digital skills! The first time I had my kids work in collaborative slides, my goals for them were to understand their work space and correctly demonstrate their understanding of number sense. The next goal I would set for my kids would be to talk more to each other about the planning of their project, and I would choose another learning objective. 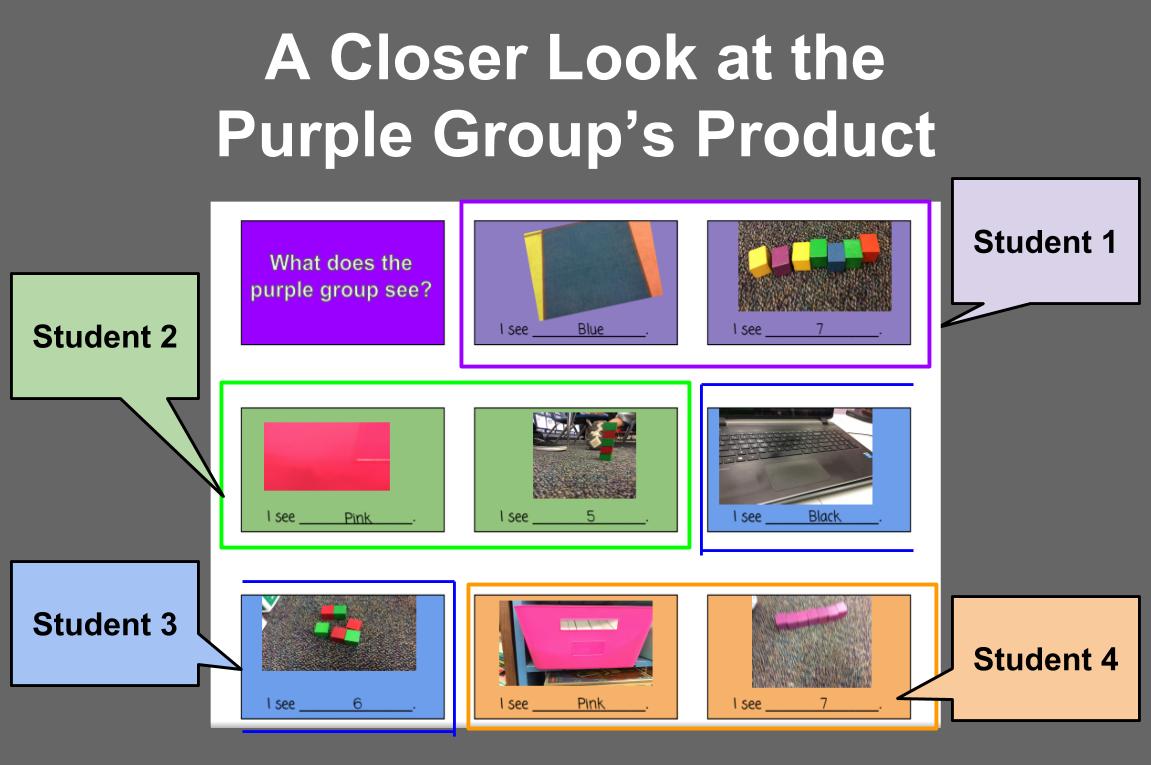
Make it Work for Your Class
Take what you like from my explanations and make it your own! Will I always do collaborative slides this way with my students? No. I like trying new approaches! In fact, I had a similar but slightly different approach when students worked in a whole class collaborative slides document. Stay tuned for that blog post.
Let’s say you don’t have device indicators on your devices, you can still assign students to colors for the group project that day. Be creative. Make. It. Work. Reach out if you have questions.
Setting Up the Template
You setup the layouts of the slides within the master slides. In Google Slides, click on View, and then Master.
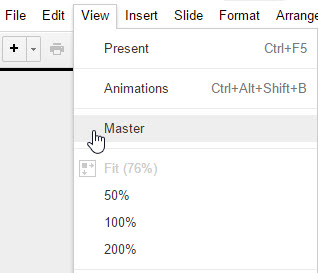
You can then edit the slides as you wish, just as you would regular slides. Feel free to use or play with my template.
Click here for my template: Collaborative Slides – I see ______.
Adding Collaborators and Assigning to Google Classroom
At this point in the setup, I turned to Alice Keeler’s blog “Google Classroom: Create Group Documents.” Alice provides fantastic step by step instructions on how create documents for small groups and references how to assign the documents in Google Classroom.