
Teachers know the first day of school is about making those initial connections with students and explaining classroom procedures, routines, and expectations. An introduction to technology should be included in those beginning-of-the-school-year elements. I was sure to include a brace map of the primary device my students would be using this year – a Chromebook.
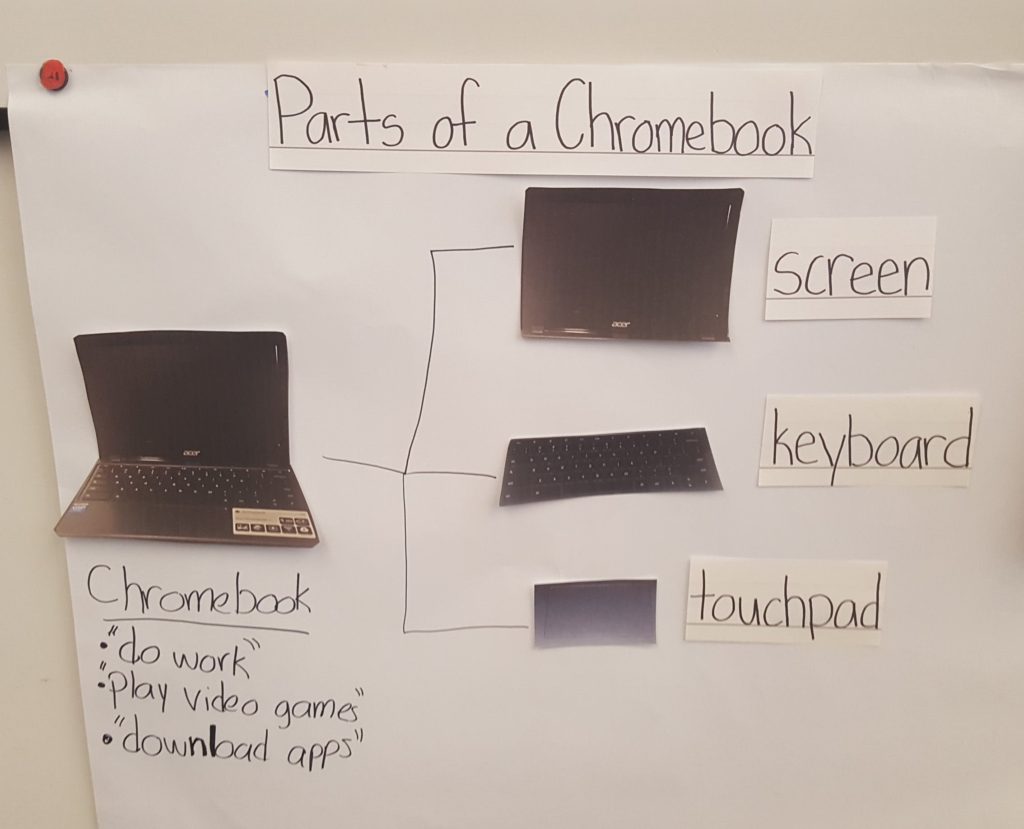
It is important that students understand the parts of the device they will be working with. The sooner they start to understand the parts: the screen, keyboard, and touchpad, the better! When I start referencing these terms in the future, I want my kids to know what I am talking about! I used a picture for each part and we discussed what each part does. Keep in mind: this is just a bunch of pictures and words to the kids until THEY are the ones using the devices and can explore for themselves how each part works.
Students may or may not have seen a Chromebook prior to your introduction. Based off of what the Chromebook looks like, they can infer what you can do with the device. I had a student who said he thought the Chromebook was a TV. Others contributed their knowledge that you “do work” and “play video games” on a Chromebook. Think of how this initial discussion of “parts of a Chromebook” can add to the kids’ technology schema!
Review!
The poster with only the blank brace (no pictures) can be laminated. The pictures and terms can also be laminated separately, so pieces of Velcro can go on the poster and on the back of the images/terms. Students can put the brace map back together again and review the parts of a Chromebook and their functions. We can’t just introduce something to the kids one time and expect them to remember it, ESPECIALLY when they are learning new terms.