
Knowing how to share a folder in Google Drive is a G Suite essential skill. Sharing a folder, or any Doc, opens up the gateways to collaboration. Teachers may need to share folders with colleagues, students, or parents. Students will need to share folders as well, especially when working on collaborative projects with peers.
Creating a PLACE for Collaboration
Create a Folder
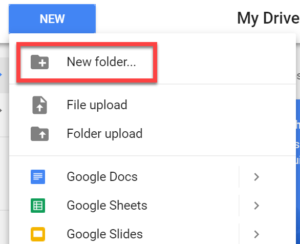
Access Google Drive, create a new folder, and title it. If you want to be fancy, you can use Shift F to create a folder as well.
Share the Folder
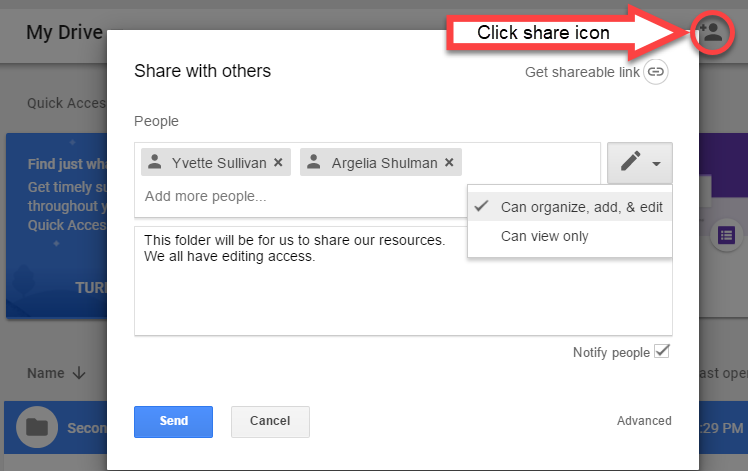
Click on the share icon (the man with the plus sign). Type the email addresses of the people you want to share the folder with. By default, the people you add will have editing access. This means that they can organize, add, and edit content that is inside the folder. Also by default, collaborators will be notified via email that you have shared a folder with them. You can type a message that will be sent along with the notification telling your colleagues what you are sharing with them.
Inside the Collaboration Place
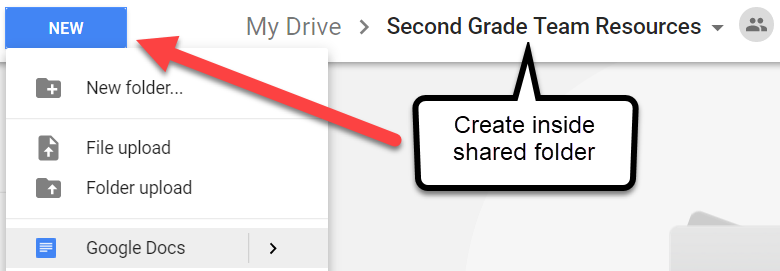
Create New Docs in the Folder
Now that you have a shared folder, you and the collaborators can add files into it and even create new Google Docs inside of it. Any Docs that you already created, can be dragged or moved into the shared folder. When you are creating a new Doc that you want your collaborators to have access to, first OPEN your share folder and then create a new Doc. That Doc takes on the share settings that are applied to the folder.
Invite People
While only you and your collaborators have access to your shared folder, you can still customize the share settings for a specific Doc. You may want to share the Doc with teacher from another site, another staff member, or even someone in your professional learning network that is outside the district! That being said, there are other sharing permissions that exist that you need to know about. Whenever you click the blue “Share” button in a Doc or icon on a folder, you will be able to see who already has access and find an Advanced word that will reveal more settings.
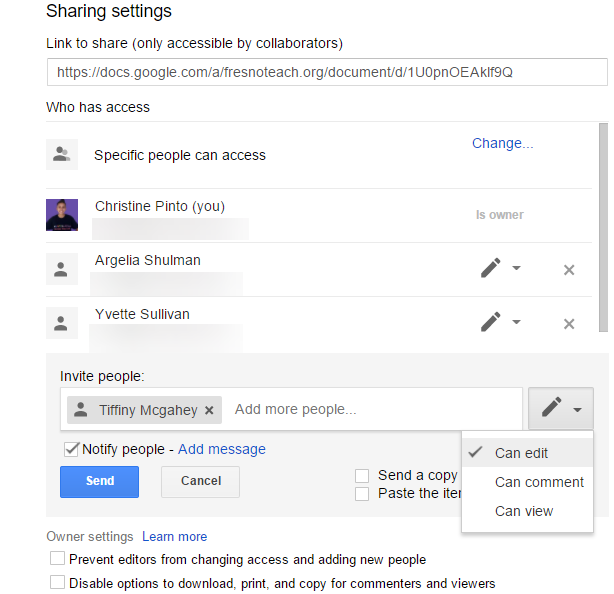
You can invite more people to view the Doc, or folder. Again, by default people will receive editing access. If you do not want them to make changes, apply the “Can view” setting. They can make a copy of the Doc if they want to customize their own. Also, if you are seeking feedback (which is always a good thing) you can apply the “Can Comment.” Notice the other Owner settings which allows you decide if editors can also share the file and disable the possibility of content being copied.
How Big is Your Audience?
What if you have a Doc that you want to share with kids’ parents? What if you want to share a Doc with A TON of people, like all the kindergarten teachers in your district? You definitely will not want to type everyone’s email address out. It would be a lot easier to pass on the link to the file you want to share. To access the file link, click on the share button or icon, and locate the link (chain) icon and click “Get shareable link.” The link icon will turn green. By default the share setting will be ONLY the people within your school/district’s domain can view the file. Click on “More” for more settings.
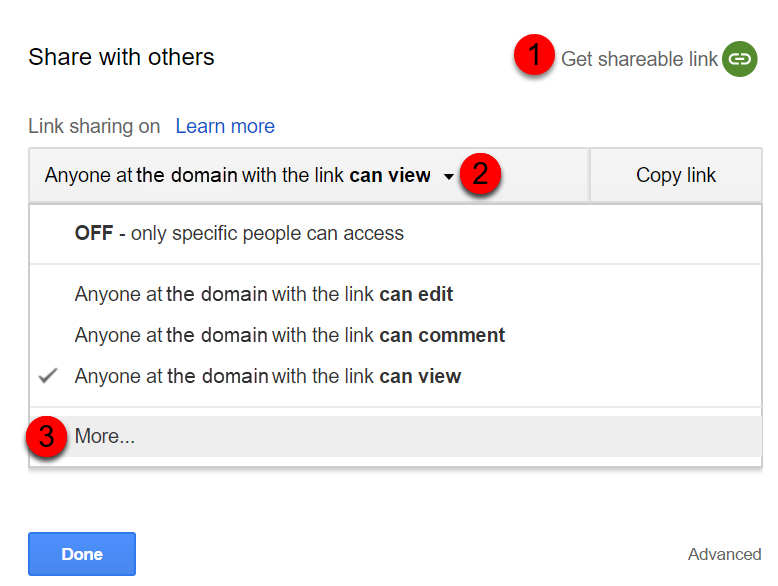
If you want people outside the domain to be able to access the file, such as parents who all have different domains for their email addresses, it needs to get changed to “Anyone with the link” can view the file (shareable link). From there, you would copy the link to the file and paste it into an email and send it to your broader audience.
While you will probably be using the “Anyone with the link” option most of the time, it is important to have an understanding of what they other settings mean.
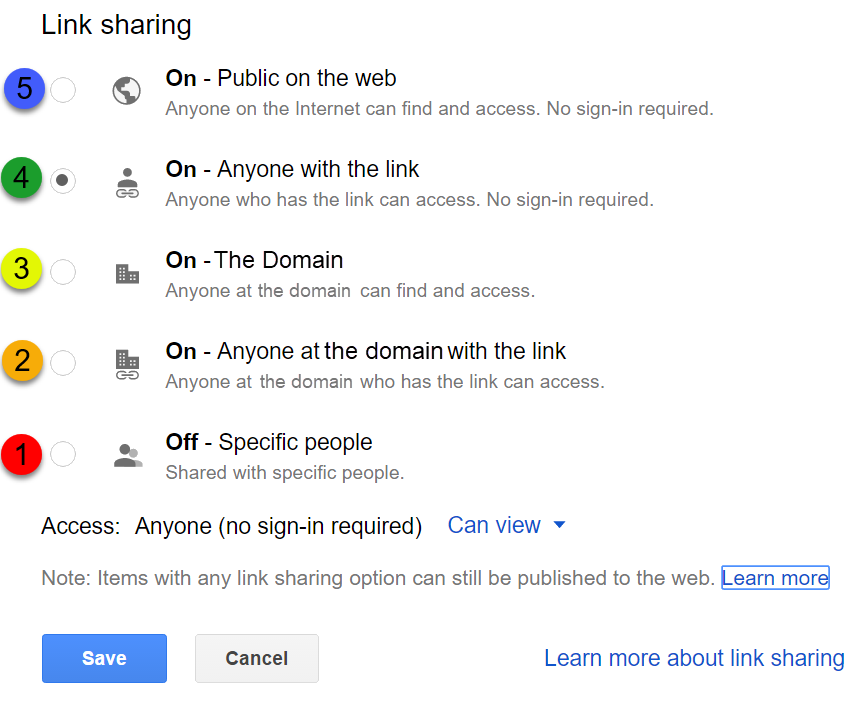
- Specific people have access to the folder. The people you invite to view or edit content in the folder are the only ones who will have access to the folder.
- Anyone at the domain with the link means that anyone from your school district who has the link to the folder can access the folder.
- Anyone at the domain can access the folder even if they do not have the link to the folder. This means anyone from your district can search “first grade” in Drive and your folder will pop up because it contains “first grade” in the search.
- Anyone with the link means that people outside of your district can access your folder IF they have the link to the folder. They do not need to have a G Suite for Education account, or even a regular Google account to access it, just the link to the folder.
- Public on the web means there are no restrictions, in that anyone on the internet can access the folder even if they do not have the link to the folder.